Are you often troubled by hip or knee injuries during your workouts? Want to ensure your lower body is adequately warmed up before hitting the gym or the field? Warming up before lower body exercises or activities is crucial, especially for those with hip or knee issues. A proper warm-up routine can prevent injuries and optimize performance. We’ll walk you through a step-by-step approach to an effective lower body warm-up routine.
A well-rounded warm-up routine aims to loosen and activate muscles, preparing your body for the strain of lower body workouts. Remember, this routine should enhance flexibility, activate muscles, and prime you for your workout.
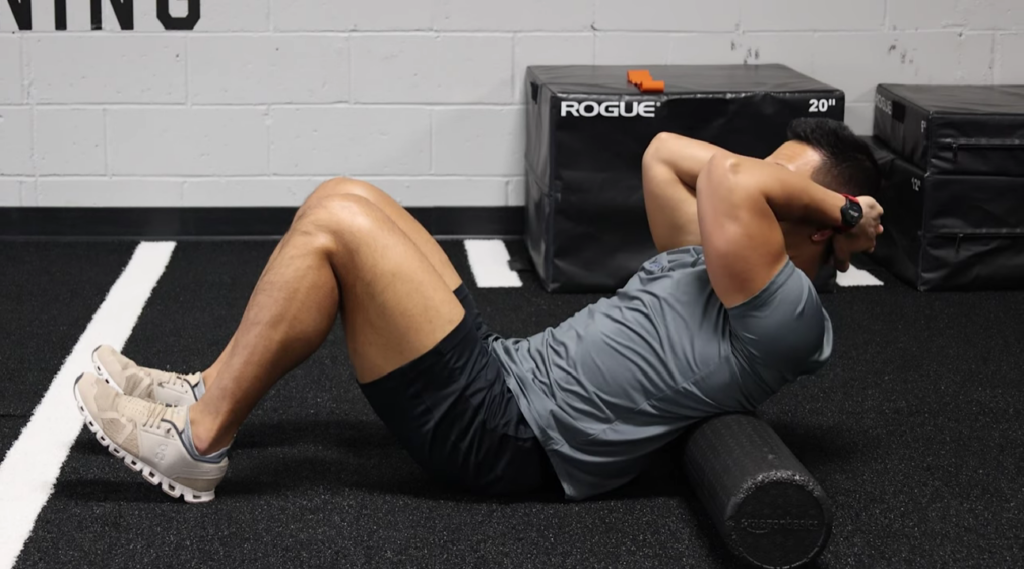
Foam Rolling the Spine
Start with the Foam Rolling exercise for your Spine. This exercise focuses on warming up and loosening the muscles along your spine, particularly targeting the paraspinals and mid-back muscles. Follow these steps:
- Preparation
- Get a foam roller and lay it on the ground vertically.
- Positioning
- Lie down on your back, positioning the foam roller horizontally underneath your upper back.
- Support
- Use your legs to support your lower body and your hands to support your head but avoid pulling on your neck.
- Rolling
- Start by gently rolling the foam roller up and down from your upper back to the middle back. Repeat this movement 10 times.
- Hold and Extend
- After the rolling, stay in a position where your mid-back is on the foam roller, allowing your hips to drop toward the ground. Allow gravity to take over and slowly extend your back. This extension helps counteract the forward hunching posture many people have due to sitting for extended periods.
Safety Note: There shouldn’t be any pain during this exercise; if there is, stop immediately.
Remember, it’s important to perform exercises like these carefully and stop if you feel any discomfort or pain. Always consult a fitness professional if you’re unsure about any exercise or if you have any underlying health conditions.
Foam Rolling for Quads and Hips
Next is the Foam Rolling for Quads and Hips exercise. This is an effective warm-up routine technique that targets the quadriceps and hips to alleviate tightness and discomfort, particularly beneficial for those experiencing knee pain or restricted mobility. This warm up aims to increase flexibility, enhance blood flow, and prepare these muscle groups for subsequent lower body exercises. Here is the Step-by-Step Guide:

- Positioning
- Lay on your side with the foam roller under the front pocket area.
- Support
- Use your other leg on the ground for support.
- Rolling Motion
- Roll up and down the front pocket area to locate the tender spot.
- Hold and Rock
- Once identified, hold on the tender spot and rock side to side for 15 reps.
- Once identified, hold on the tender spot and rock side to side for 15 reps.
Tip: The TFL muscle influences knee rotation. If it’s tight, it may affect the knee negatively, so focus on this muscle group first.
Hip Flexors and Quads Rolling
Hip Rolling: Situate the foam roller under the hip’s sit bone.
- Option 1
- Keep the leg straight and roll up and down.
- Option 2: Cross one leg over for a more intense roll.
- Rolling Technique: Perform 10 reps of rolling up and down for each side.
- Tip: Tightness in the hips or back pain due to the piriformis muscle can be relieved with this technique.
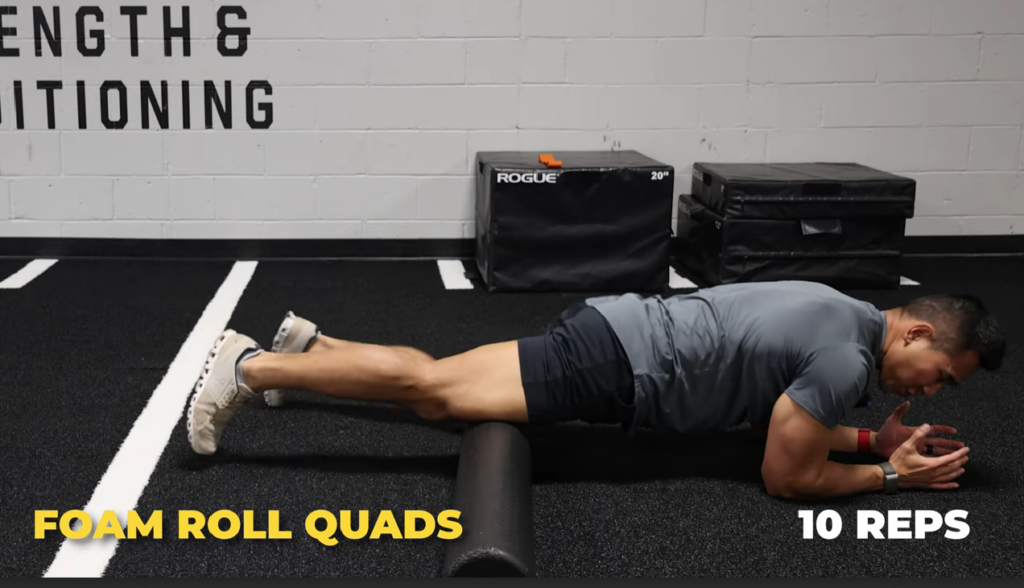
Quads with Movement
- Rolling Technique: While rolling up and down, identify the tender area within the quads.
- Hold and Extend: Once found, hold on that spot and perform 10 reps of kicking and extending the leg.

Tip: This movement helps release quad tightness and enhances flexibility, benefiting squats and deadlifts.
By incorporating this foam rolling routine into your warm-up regimen, you can better prepare your lower body for exercises, minimize discomfort, and optimize your workout performance.
Calf and Hamstring Focus
This exercise aims to target the tightness in the calves and hamstrings, both common areas of tension due to everyday use. By performing this routine with a foam roller, you can relieve tightness and enhance ankle mobility, which in turn reduces stress on the knees during exercises like squats, deadlifts, or running. Here is the step-by-step guide:
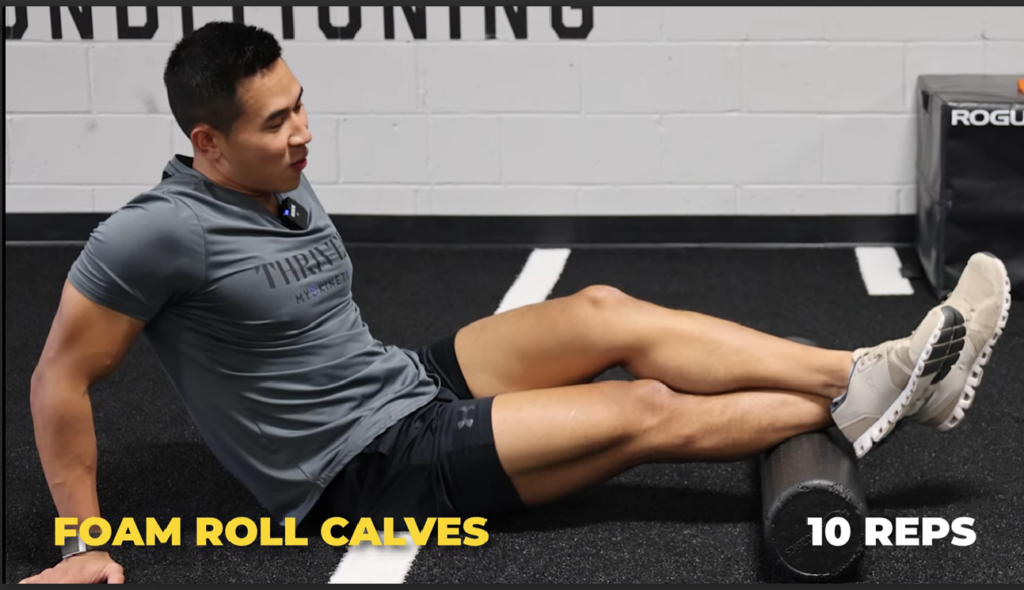
Calf Rolling
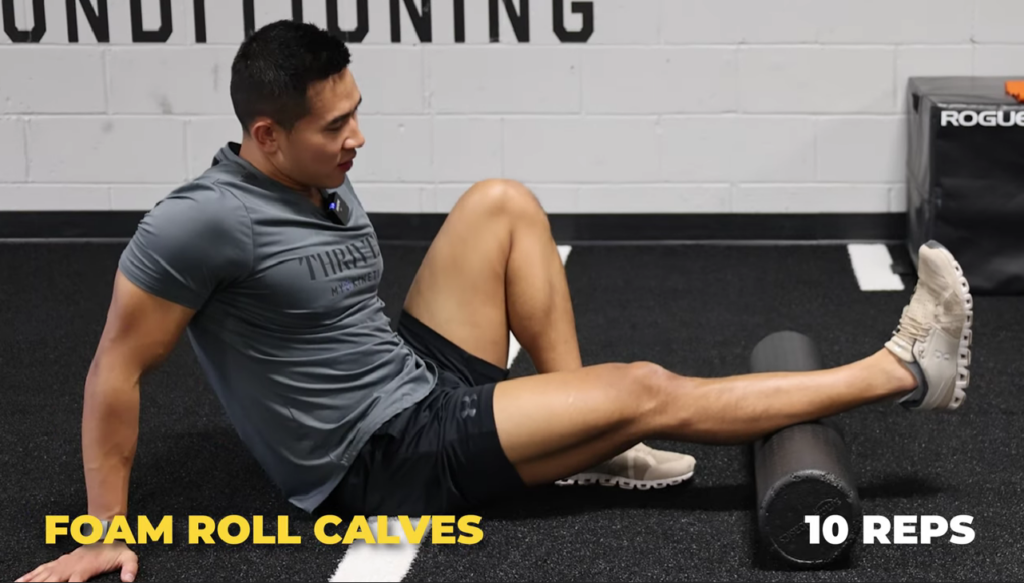
- Positioning: Begin by placing the foam roller under your calves.
- Gentle Pressure: Apply gentle pressure and roll up and down to locate tender spots.
- Identify Tender Areas: Explore the calf area to find the most tender spots.
- Over Pressure: Once located, drop your buttocks down and add slight pressure by crossing one leg over the other.
- Toe Pointing Motion: While maintaining pressure, point your toes up and down by bringing your foot toward and away from your body.
- Discomfort Level: Aim for a discomfort level of around 3 out of 10 to ensure it’s tolerable yet effective.
- Benefits: This motion enhances ankle range of motion, reducing knee stress during exercises.
Hamstring Rolling
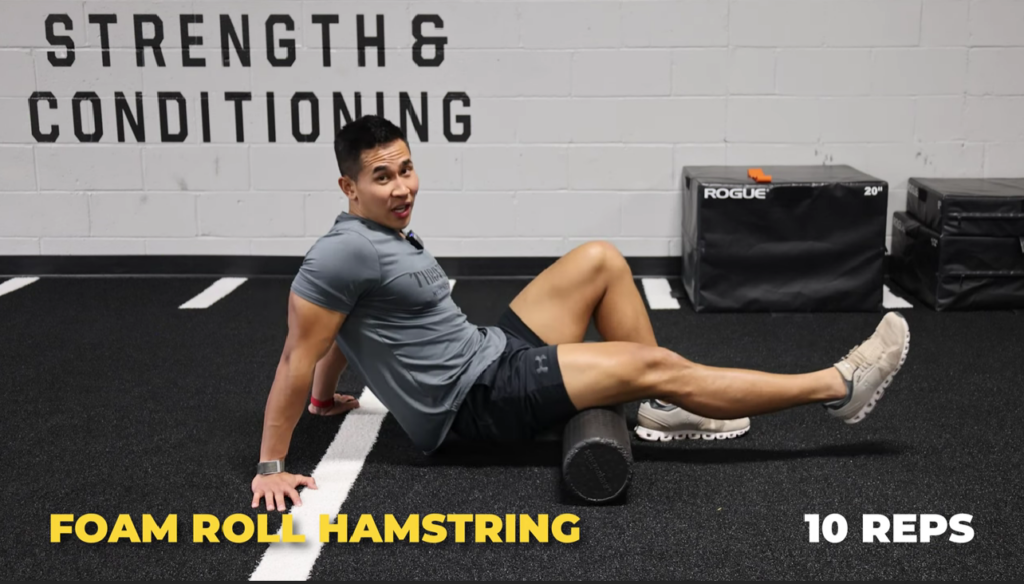
- Positioning: Place the foam roller under your hamstrings.
- Rolling Motion: Roll up and down to explore and identify tender areas.
- Pressure Adjustment: If needed, you can add more pressure by crossing one leg over the other.
- Rotational Movement: While applying pressure, rotate your leg slightly side to side to target different areas of the hamstring.
- Optional Test: Perform a squat before and after this exercise to feel the increased flexibility and reduced tension in your hamstrings.
By incorporating these foam rolling techniques into your warm-up routine, you can significantly reduce tension in your calves and hamstrings, enhance ankle mobility, and mitigate stress on your knees during exercises, leading to a more effective and comfortable workout session.
Ankle and Hip Mobilization Techniques
These exercises focus on mobilizing your ankles and hips to improve range of motion and reduce pain during lower body training. Here’s a detailed step-by-step guide for each exercise:
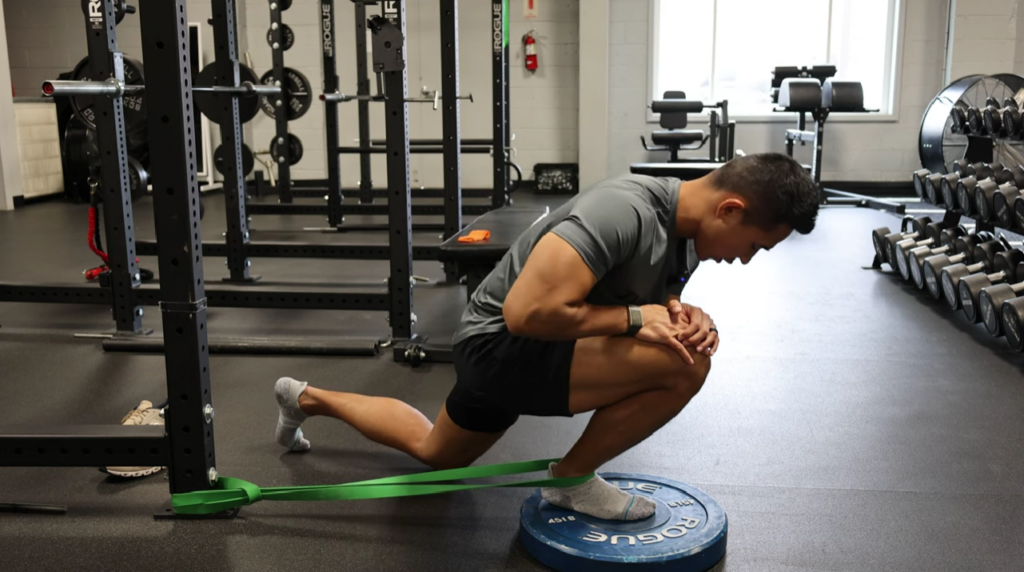
Hip Mobilization
- Setup
- Take the mobility band and place it between the two bones of your ankle, just above your ankle joint.
- Loop the other end of the band over the top of your foot. The band should exert a downward force when you move.
- Equipment Needed
- Mobility band
- A plate or stable surface
- Execution
- Kneel down with the band in place.
- Keep your heel flat on the ground.
- Slowly rock your knee forward over your second toe while the band pulls your ankle backward.
- Focus on the movement and don’t let your heel lift off the ground.
- Perform gentle, controlled movements, ensuring you feel a stretch but no pain.
- Repeat this motion for several reps on each ankle, paying extra attention to the ankle that feels stiffer or has a history of sprains.
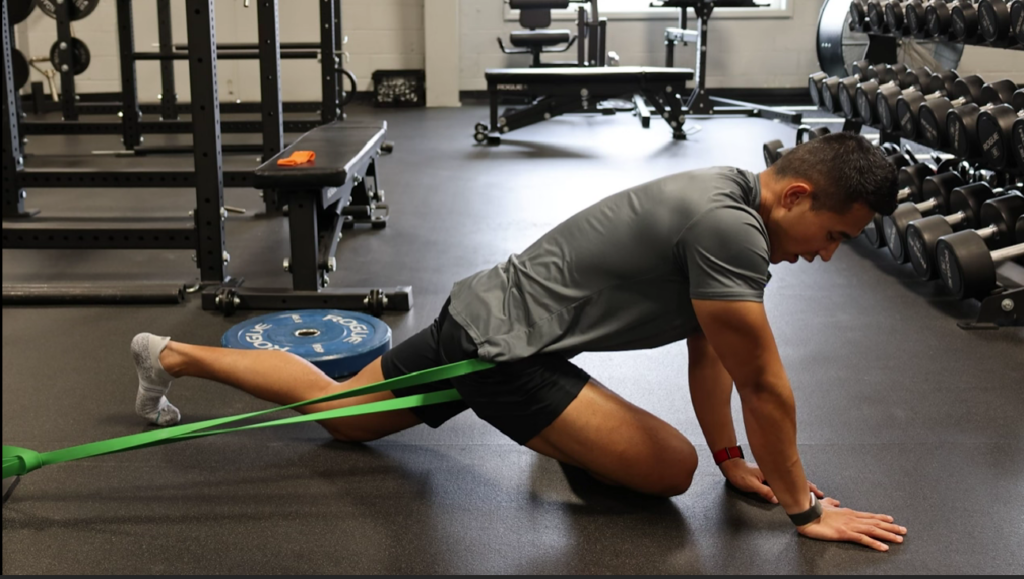
Hip Traction
- Place the band around your hip and secure it in front.
- Assume a 45-degree angle position, similar to a pigeon pose, with the band pulling your hip backward.
- Lower yourself slowly to feel a stretch in the hip.
- For an added stretch, rotate your torso away from the banded leg.
- Hold the stretch for a few seconds, then gently release and return to the starting position.
- Rotate back and forth for about 10 repetitions, maintaining a controlled and comfortable stretch.
Flexor Stretch
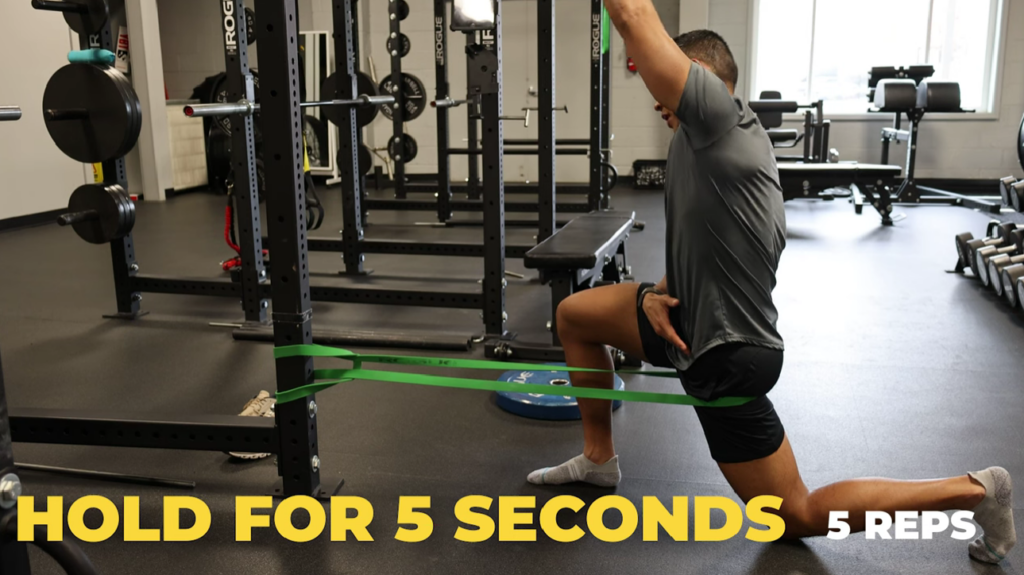
- Loop the band under your buttocks and position it on the leg you’ll stretch.
- Bring that knee down towards the ground, maintaining a tucked tailbone and avoiding arching your back.
- Lean slightly forward to intensify the stretch on the front of your hip.
- Hold this position for about 5 seconds.
- To increase the stretch, reach upward with the opposite hand while holding the position.
- Return to the starting position and repeat on the other side.
- Tips
- Breathe steadily throughout each exercise.
- Focus on controlled movements and feeling a comfortable stretch without pain.
- Spend more time on areas that feel tighter or have a history of discomfort.
- These exercises aim to improve flexibility and reduce pain, so take your time and don’t rush through them.
Performing these exercises consistently can enhance the range of motion in your ankles and hips, potentially reducing discomfort during lower body exercises like squats and deadlifts.
Activation Exercises: Bandwalk and Goblet Squat
This exercise aims to activate and engage the glutes, quads, and core muscles in preparation for more intensive lower body workouts. It helps establish a stronger mind-muscle connection and primes the muscles for efficient engagement during subsequent exercises.
Bandwalk
- Setup
- Place a resistance band around your legs, just above the knees.
- Positioning
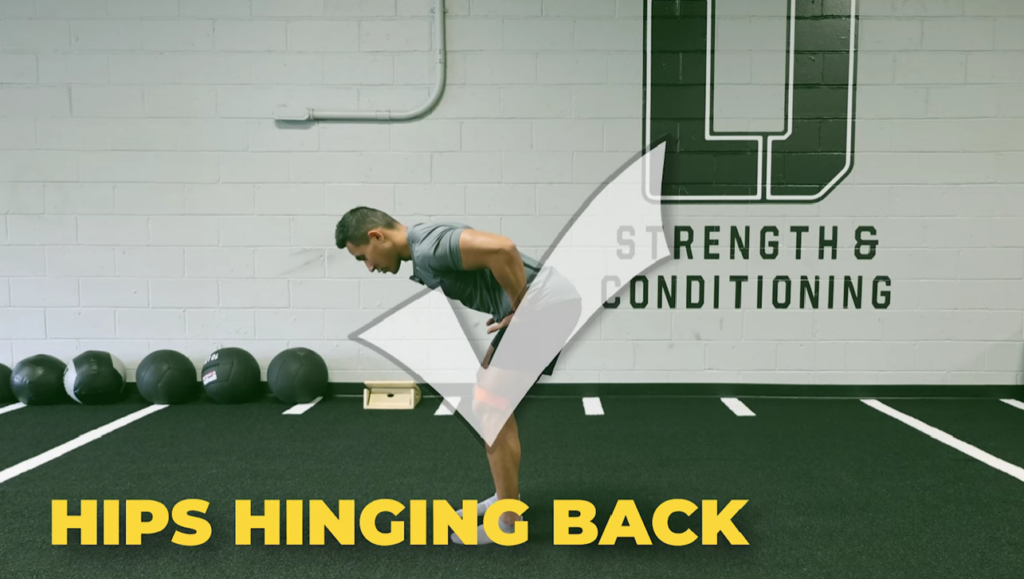
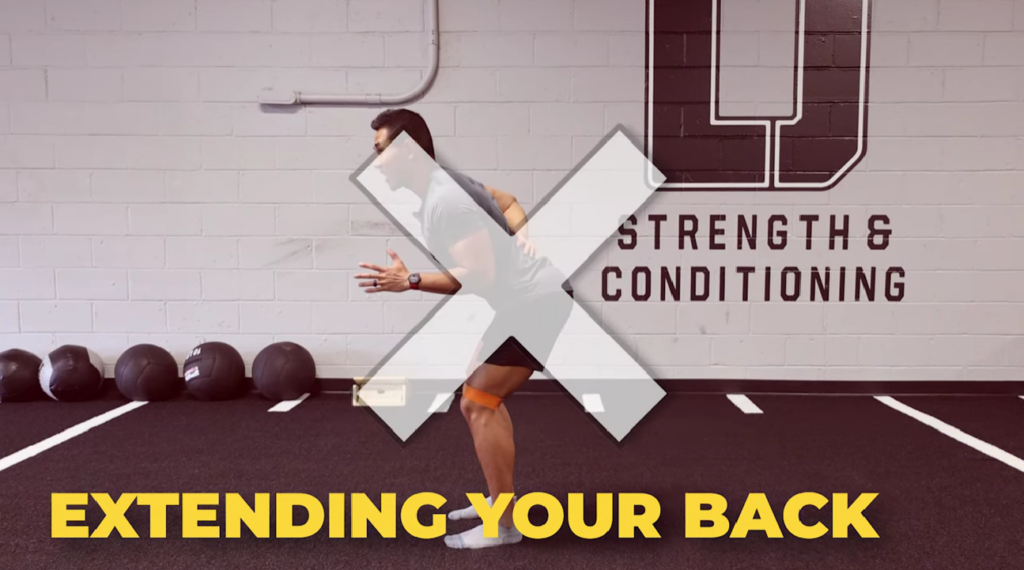
- Stand with your feet shoulder-width apart, maintaining a neutral spine (avoid arching the lower back).
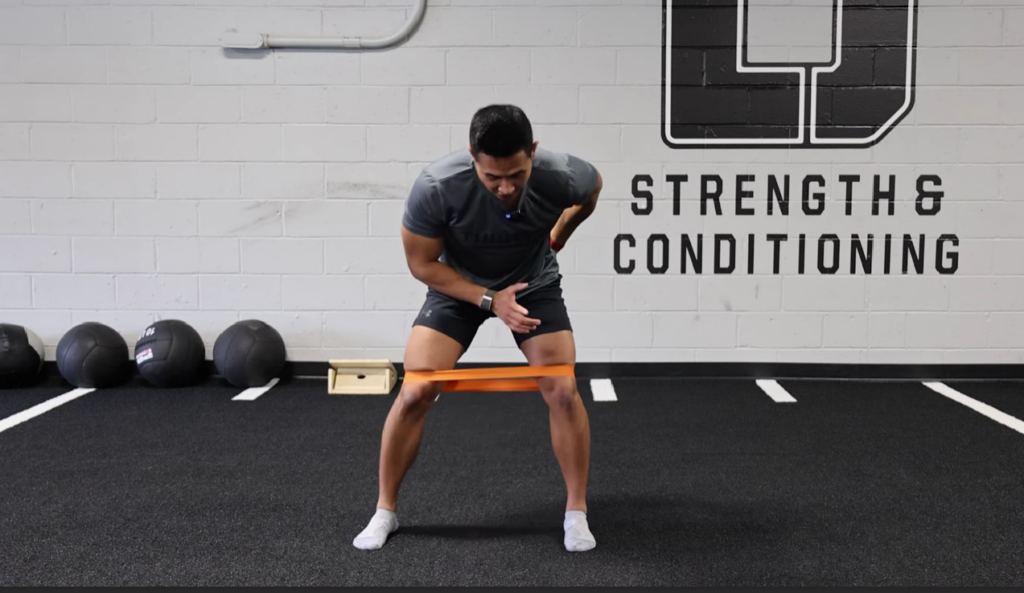
- Movement
- Initiate the movement by hinging slightly at the hips, not by arching the lower back.
- Keep the band tensioned and ensure it doesn’t pull your knees inwards.
- Begin walking sideways by pushing off with one leg (e.g., left leg pushes to move right).
- Focus on feeling the burn on the sides of your hips, not the lower back.
- Maintain the tension in the band and the neutral spine throughout the movement.
- Tip: Avoid overextending the back, as it might disengage the hips and load the lower back instead.
Goblet Squat
- Preparation
- Hold a kettlebell or a weight close to your chest.
- Squat Position
- Stand with your feet shoulder-width apart.
- Keep the weight centered and close to your body.
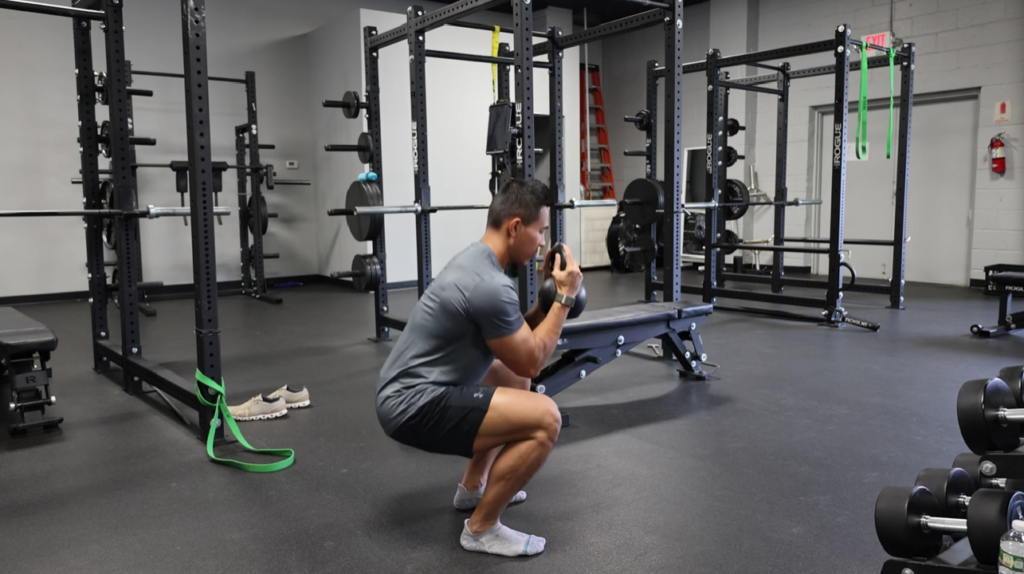
- Squat Technique
- Engage your core by not arching the back and slightly shifting your weight onto your butt.
- Lower yourself into a squatting position, maintaining a straight spine.
- Ensure your knees track in line with your toes and don’t cave inward.
- Push through your heels and return to the starting position, squeezing your glutes at the top.
- Focus on controlling the movement and feeling the engagement in your quads and core.
- Execution
- Perform the Band Walk with proper tension and form, focusing on feeling the burn in the hips.
- Transition into the Goblet Squat, maintaining core engagement and proper squatting technique.
- Aim for 8 to 10 reps of the Goblet Squat to warm up the quads and core muscles effectively.
- Tip
- Maintain a controlled pace and prioritize form over depth if necessary.
This dynamic exercise sequence efficiently primes and activates the targeted muscle groups, preparing your body for subsequent lower body exercises, enhancing performance, and reducing the risk of injury.
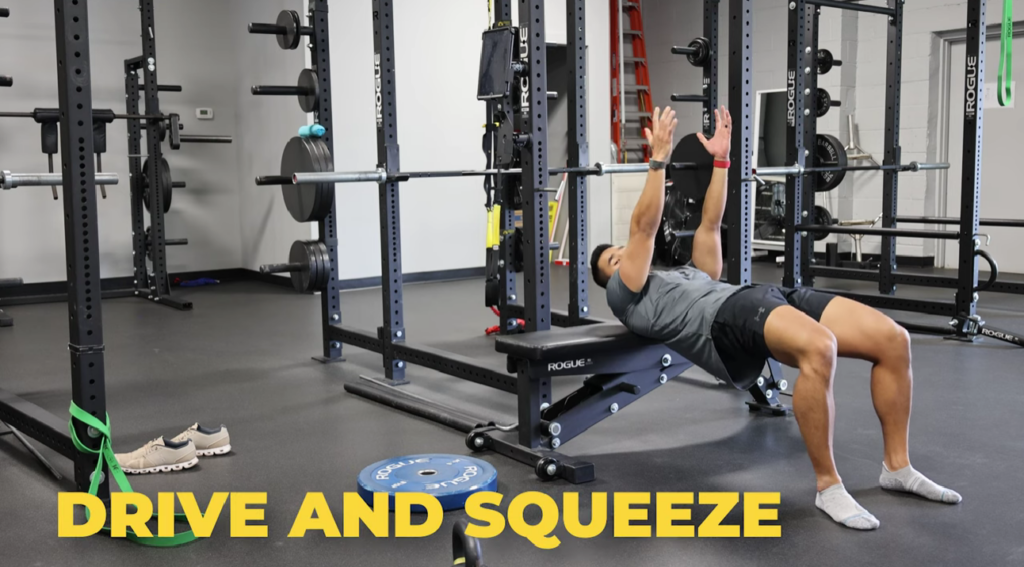
Glute Bridges for Activation
The last exercise is glute bridge exercise aimed at activating the hamstrings and gluteal muscles while engaging the core. This movement helps in developing stability and strength in the posterior chain, promoting better control of the hips and core simultaneously.
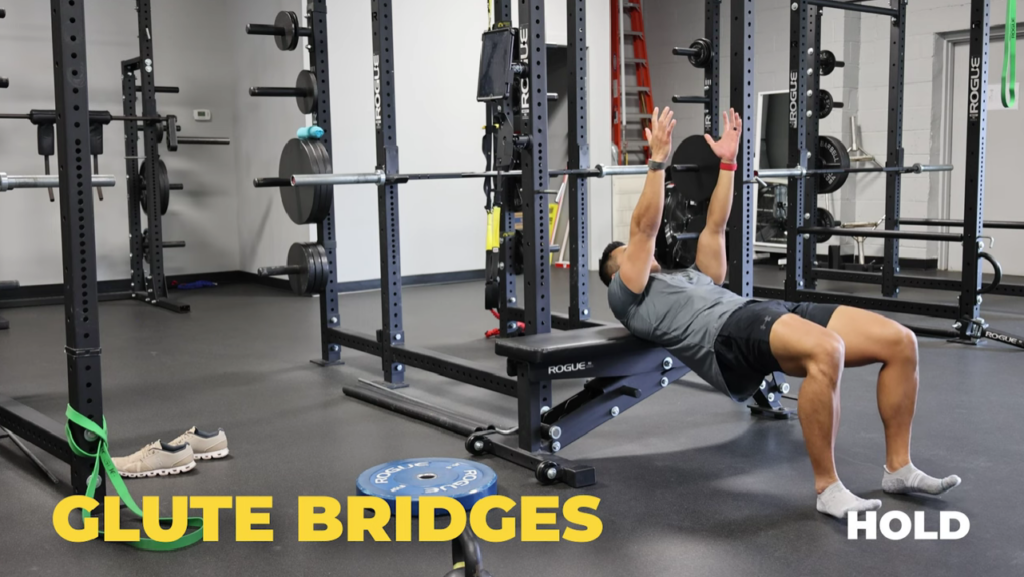
- Setup
- Lie flat on your back with your knees bent, feet flat on the ground, and arms by your sides.
- Positioning
- Keep your feet hip-width apart and close to your buttocks.
- Ensure your spine is in a neutral position, neither arched nor pressed into the floor excessively.
- Movement:
- Engage your core muscles by pretending there’s a glass of water balanced on your pelvis.
- Inhale deeply.
- As you exhale, press through your heels and drive your hips upward toward the ceiling.
- Squeeze your glutes at the top of the movement while keeping your core engaged to maintain stability.
- Your body should form a straight line from your shoulders to your knees at the top of the bridge.
- Hold this position for a moment, feeling the contraction in your hamstrings and glutes.
- Lower your hips back down slowly and with control.
- Repeat this movement for a set of 5 reps, focusing on quality contractions.
- Tips
- Maintain a steady breathing pattern throughout the exercise.
- Focus on the mind-muscle connection, emphasizing the engagement of the glutes and hamstrings.
- Avoid overarching your lower back; instead, keep it in a neutral position.
- Ensure that your feet are planted firmly on the ground throughout.
Movement
Adding the glute bridges to your warm-up routine can significantly activate and engage key muscle groups, enhancing your readiness for physical activity and reducing the risk of injury during workouts or sports practices.
Check out this video with Dr. Natty for visual demos!
Conclusion
A well-executed warm-up routine like this, within 10-15 minutes, can significantly prepare your body for any lower body workout or activity. Regularly incorporating this routine before workouts can enhance performance and reduce the risk of injuries related to hip and knee issues.
Remember, an effective warm-up is like an appetizer before a meal, setting the tone for the main course. So, take the time to properly prepare your body—it’s a small investment for a significant payoff in your workout performance and overall well-being.
At Myokinetix, we’re committed to supporting your fitness journey. Our team of healthcare professionals, coupled with our cutting-edge equipment, we are here to help you achieve your fitness goals effectively and safely. Ready to optimize your workout routine and minimize the risk of injuries?
Join our active community and experience the journey towards remarkable milestones in an environment that fosters progress and successful recovery.
Book a call today to learn more about how we can assist you in reaching your peak performance.